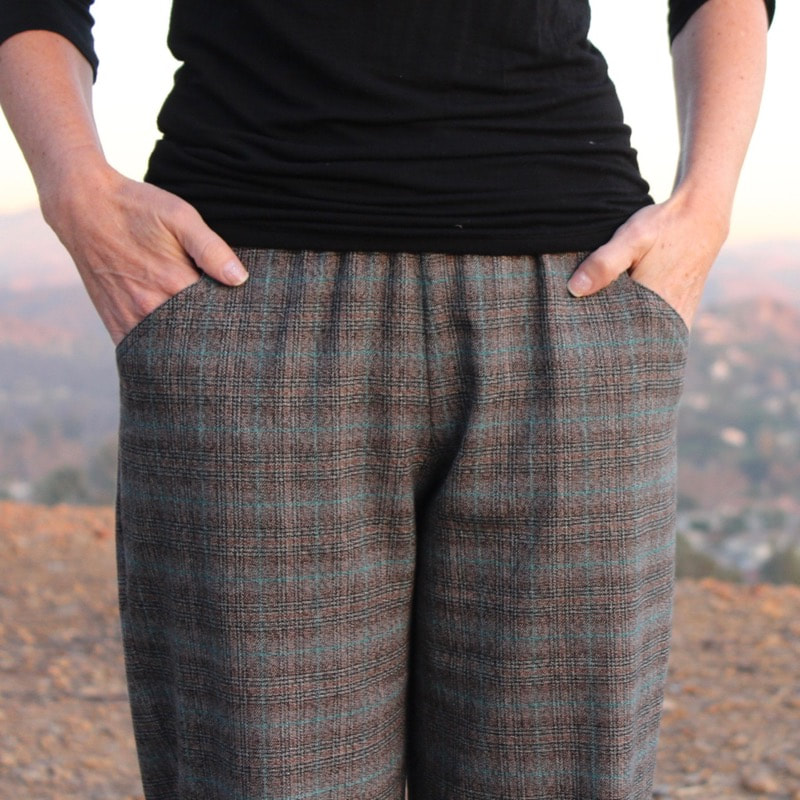
 A sewing project can start forming from different inspirations. Sometimes it's a fabric, or a need I have in my closet but in this case it came from ready to wear. I've seen some adorable striped pants around and couldn't wait to make my own.
These pants are from Madewell and since I love elements of both I combined them into one pant. I added a button placket at the hem and made a channel elastic waistband. These are easy additions to an already simple pant, but the details really make it special.  I chose a linen/rayon blend uneven stripe as the fabric and paired it with the Coffeehouse Pant pattern. Here are the changes I made to get the look I wanted:
I was able to use the waistband pattern as is and just added 3 rows of stitching each 1/2" apart. I used this nifty seam guide foot I have for my Janome machine to keep all the channels even. I'm really happy with how it came out and the band is really comfortable.
To make the placket, I added an extension at the outside hem on both the front and back pieces.
I'll be adding a blog post soon on how I worked with the uneven stripe. It can be done, so those of you who shy from these fabrics, don't dismay because they can be tamed. Stay tuned!
The Coffeehouse Pant PDF pattern is combined with the Morrison Top/Dress PDF pattern in a "Summer Bundle" for just $15! Happy sewing, friends! I hope you're all well. Diane
3 Comments
 I’m very excited to start the new year with a new pattern! Say "Hello" to the Coffeehouse Pant! It’s an easy to wear and even easier to sew ankle length pant with front notch pockets and an elastic waist. It's available today and is on a NEW RELEASE SALE for 20% off here on the website and at Upcraft Club until January 14th!  Let me introduce you...
 The Coffeehouse Pant sews up nicely in light to medium weight fabrics ideally with some drape. Linen, challis, crepe and chambray would all be good choices. Look at the darling pants Kyla from LifebyKy made out of a soft suiting.  Grab a copy at 20% off at Upcraft Club and on the BDP website through January 11th! Don't forget to tag all your makes #Coffeehousepant and #Bluedotpatterns. Enjoy!
 This is my last spring/summer make and it's taken me a while to post it. I bought this pink fabric last summer for a pair of pants but never got around to making them. There’s never enough time, right? So this year I made it a point to get to it even though it’s almost fall and I really won’t wear them much until the spring. I didn’t pay a whole lot for the fabric so I chose a new pant pattern and attempted a wearable muslin.  I used the Lisette Pattern 6331 by Butterick because I liked the narrow leg (there’s a cute jacket included in the pattern if you’re interested) and the opportunities for topstitching. There is a back yoke on the pants which makes me wonder if I should call them jeans or pants. They’re something like the Chevy El Camino. Is it a car or a truck?  I made all of my usual adjustments to the pattern which included adding 3/4” to the back rise and “scooping” out the crotch and redrawing the curve by copying the curve from my favorite pants pattern. This pattern has a straight waistband which almost never works for me so I ditched the waistband pattern entirely and used my own curved waistband. Typically when there’s a straight waistband on a pattern, the pants/skirt are drafted to sit all the way up to the waist, 80’s style. Now there’s nothing wrong with the 80’s (except for the red suede scrunchie boots I may or may not have worn) however, 1 1/2” lower at the waist would be more comfortable for me.
I don’t remember the fabric content of these pants but I can tell you it has ALOT of spandex and is quite stiff. The spandex thing is such a catch 22, isn’t it? We love how woven fabrics with stretch feel but it’s frustrating when a garment loses it’s shape after just a couple of hours. Don’t you hate the jeans you have that fit great in the morning but get the “baggy butt” by lunchtime? This is only part of my fit problem, however, so I still need some adjustments.
You can see in the photo that there’s too much fabric at the top of the back thigh. In the future, I’ll take out 2” horizontally at the top of the thigh (I know the pic on the right is a sketchy photo and I have no pride, but I wanted to show the problem in the hopes of helping other sewists, right?) and add the 2” back in at the hem before I make the next pair. The adjustment will look like this:  If I make these pants/jeans again I’ll change a couple of things:
I have a Dover Jacket that I turned into a dress under the machine right now. What are you sewing? |

About MeHi! I'm Diane, a wife, mom, sewing teacher and pattern designer from sunny Southern California. I share my sewing adventures here on the Blue Dot Blog formerly Gatorbunnysews. For more info click here. 
Categories
All
Archives
October 2022
|


 RSS Feed
Proudly powered by Weebly